Septic Tank Inspection Checklist: What Pros Check During Service in Hesperia, CA
When a crew opens your septic tank in Hesperia, CA, they are working through septic inspection steps—a checklist whether you see it written down or not. Knowing what is on that checklist tells you two things: what you are paying for, and how a full cleaning differs from a basic pump-out. This guide walks through the inspection steps professionals follow, in order, so homeowners and property owners can judge whether a service visit was thorough or just a quick vacuum job.
This matters whether you own one home with a tank, manage a rental property where tenants reported a smell, or run a cabin or RV setup out in the High Desert. More than one in five U.S. households depend on individual septic systems or small community cluster systems to treat their wastewater, according to the U.S. Environmental Protection Agency. If you are one of them, this checklist is the backbone of keeping that system alive.
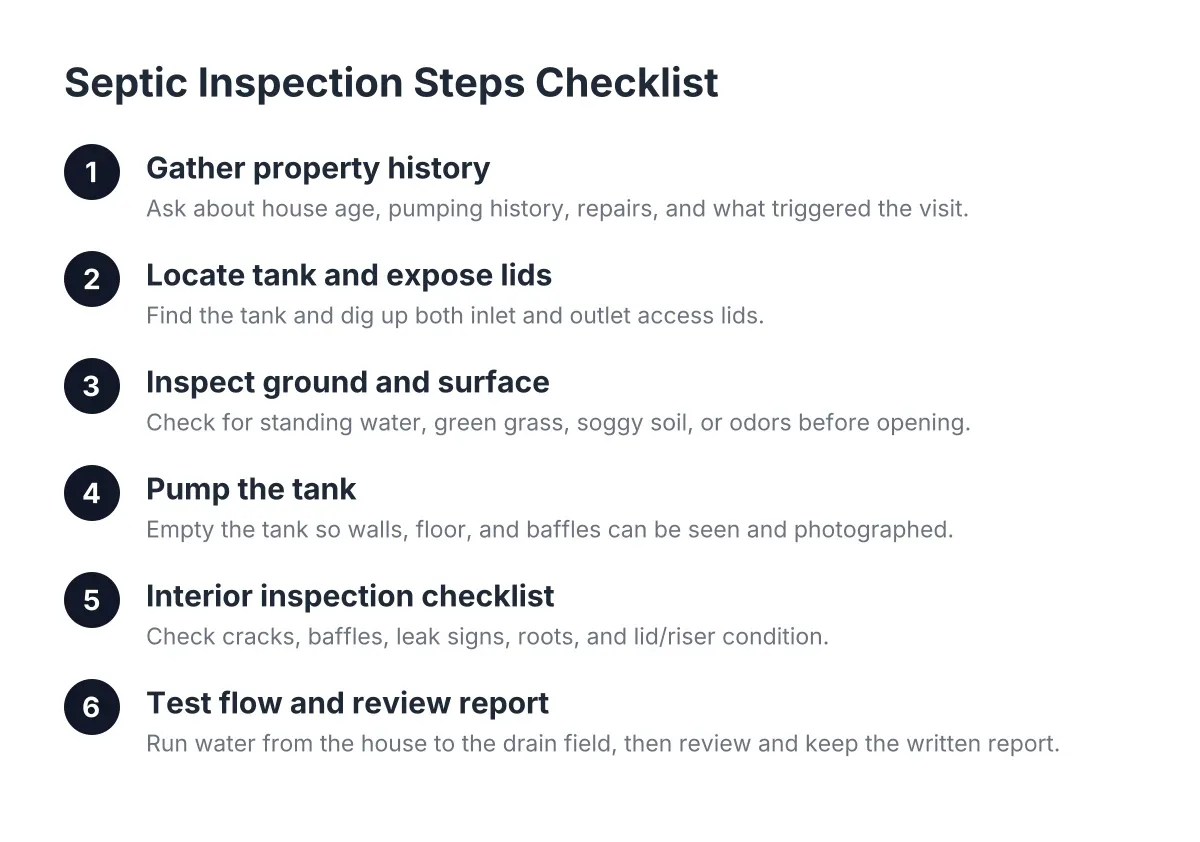
Step 1: Gather the Property History Before Anyone Digs
Before a crew puts a shovel in the ground, a good inspection starts with questions. Expect the service to ask about the age of the house, how often the tank has been pumped, any repair history, and where the property sits. A low spot near a wash behaves differently than a hilltop lot.
If you are a landlord who just took over a rental in Hesperia, this step is where you earn your money. Pull together whatever records the previous owner left: old receipts, a septic tank inspection report from a past sale, or a county permit. No records at all is itself useful information; it tells the crew to assume the tank has never been checked and to look harder.
In addition, write down what triggered the visit. Slow drains, a tenant complaint about odor, a sale inspection requirement, or just a calendar reminder. Each one points the inspector toward different problem areas.
Step 2: Locate the Tank and Expose the Lids
Next, the crew finds the tank. On a well-documented property this takes minutes. On an older Hesperia lot with no site map, it can involve probing the yard, following the main sewer line out from the house, or using locating equipment. Septic tank locating is a standard part of service for a reason; you cannot inspect what you cannot find.
Once located, the crew digs up the access lids. A proper inspection needs both the inlet side and the outlet side exposed, not just one hatch. Checking only one end of the tank misses half the story, because the inlet and outlet each have their own common failure points.
Mark the lid locations once they are found. A simple sketch with measurements from the house corner saves the next crew an hour of probing, and it belongs in your own septic tank maintenance checklist going forward.
Step 3: Inspect the Ground and Surface Conditions First
Before opening anything, the inspector reads the ground. Standing water, unusually green grass over the drain field, soggy soil in a dry High Desert yard, or a sewage smell near the tank all point to trouble. These surface signs often reveal a failing drain field or a leaking tank before the lid ever comes off.
For example, suppose a landlord gets a call about a smell at a rental and cannot be on-site. A crew that documents surface conditions with photos gives that owner proof of what was found, which matters for habitability records and for deciding whether this is a pump-out or a repair conversation.
The inspector may also wash down the area around the risers and pipe connections. Dirt and grime hide cracks and pipe damage; cleaning the area off can expose a problem that was invisible a minute earlier.
Step 4: Pump the Tank So the Interior Can Be Seen
Here is the core difference between a basic pump-out and a real inspection. You cannot assess a tank full of sludge. Pumping the tank first gives the technician a clear view of the walls, the floor, and the baffles, and lets them photograph the true condition of the interior.
This is also where septic tank cleaning goes further than pumping. Pumping removes the liquid and floating material through the vacuum hose. Cleaning works the settled sludge and the hardened scum layer off the tank interior, so the inspection that follows is looking at bare concrete instead of a coated surface. If a crew pumps the liquid and leaves without touching the sludge blanket, the inspection portion of the visit was limited at best.
During pump-out, a sharp operator also notes how the tank drains. A tank that was filled above its normal operating level suggests a downstream problem, usually the outlet or the drain field, and that observation goes straight onto the report.
Step 5: Work Through the Interior Septic Inspection Steps Checklist
With the tank empty, the technician checks the structure itself. The interior portion of a septic tank inspection checklist covers these items:
- Cracks or deterioration in the tank walls and floor, especially in older concrete tanks
- Inlet baffle or tee: present, intact, and not clogged with solids
- Outlet baffle or tee: present, intact, and positioned correctly
- Evidence the tank has leaked, such as staining or water lines that do not match normal operation
- Roots entering near the lids, pipe penetrations, or seams
- Condition of lids and risers, including whether they seal and are safe to walk near
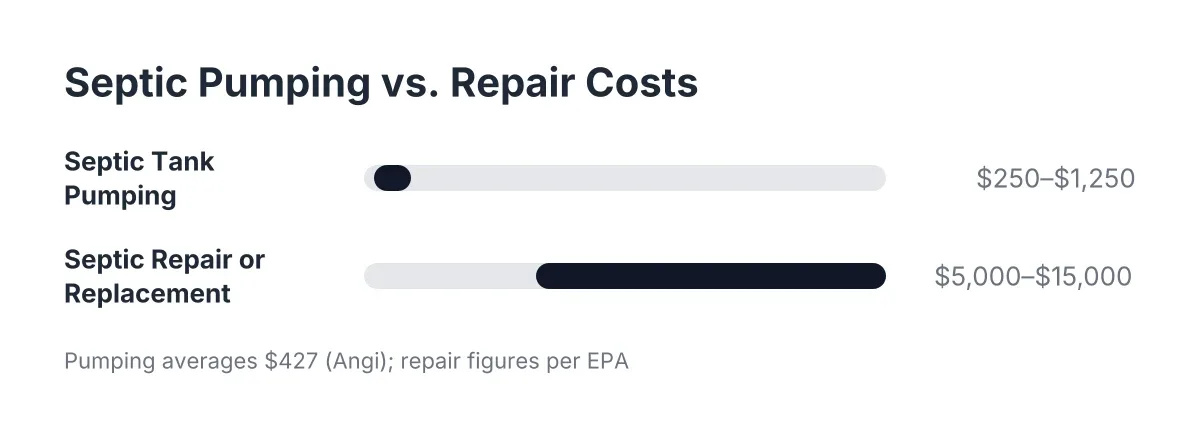
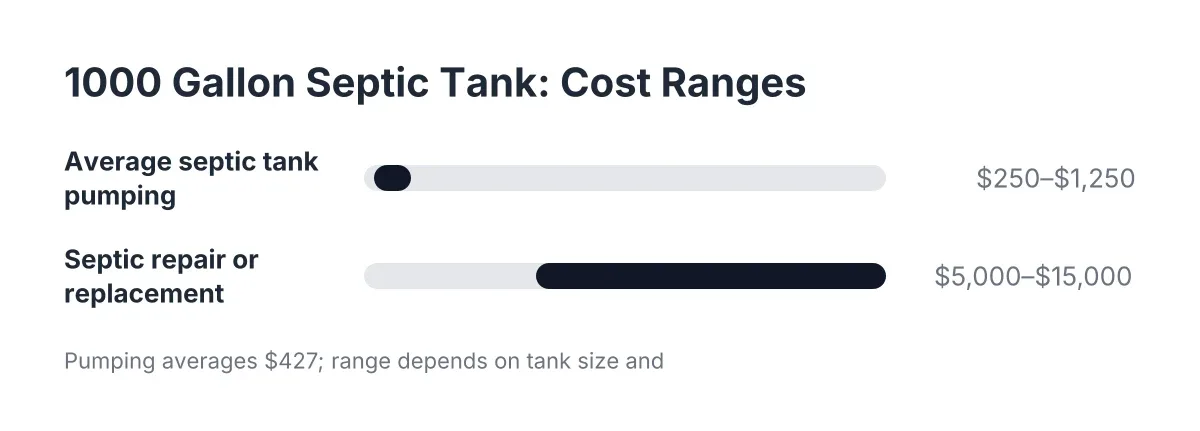
The baffles deserve special attention. According to the University of Nebraska-Lincoln Extension, the outlet pipe must sit lower than the inlet, because solids float on top of the liquid and only clarified liquid should exit toward the drain field. A missing or broken outlet baffle lets solids flow out and clog the drain field, which is the expensive part of the system. The EPA estimates septic repair or replacement typically costs $5,000 to $15,000, far more than routine pumping, so a two-minute baffle check protects a five-figure asset.
Photos matter here. Ask for interior pictures with the report. For a non-residential operator keeping compliance files, or a homeowner preparing for a sale, photo documentation is the difference between "the guy said it looked fine" and a record you can hand to an inspector or a buyer.
Step 6: Test Flow From the House and to the Drain Field
A tank can look perfect and the system can still fail. Therefore, the next checklist item is a function and flow test. The technician runs water from the house and watches it arrive at the tank through the inlet, confirming the line from the building is clear and sloped correctly.
Then attention turns to the outlet side. According to the U.S. Environmental Protection Agency, a conventional septic system has two main components: the septic tank and the drain field. The tank clarifies wastewater; the drain field disperses the liquid into the soil. The inspection confirms liquid is leaving the tank and the drain field is accepting it, with no backflow into the tank after pumping.
However, a standard service inspection has limits. It evaluates what is visible and how the system behaves that day. It cannot see inside buried drain field lines, and it is not a soil study. If the flow test raises questions about the drain field, the next step is a deeper evaluation, and for anything involving system redesign or replacement, a licensed installer or your county health department needs to be involved.
Step 7: Review the Written Report and Keep It
Every inspection should end with documentation. A standard septic tank inspection report records the property address, date of service, work performed, tank material, whether problems or needed maintenance were found, whether the tank showed signs of having been full, the condition of the tees and baffles, and overall tank integrity.
As a result, you walk away with more than an empty tank. You get a baseline. The next crew, the next buyer, or the next health inspector can compare future conditions against it. Landlords and small business owners in Hesperia should file these reports the same way they file receipts; they are your proof of maintenance if a tenant dispute or compliance question ever comes up.
If a company cannot produce a written record, that is a reason to look elsewhere when searching for septic tank cleaners near me. Paperwork is cheap. Problems discovered with no baseline are not.
Also worth reading: Septic Tank Inspection Reports: How to Read Results and Recommendations.
Step 8: Set the Next Inspection Date Before You Forget
Finally, put the next service on the calendar. The U.S. Environmental Protection Agency recommends a professional inspection at least once every three years for the average household, and once a year for alternative systems with pumps, float switches, or other mechanical parts. Penn State Extension notes that an active family of four generally does well pumping every two to three years because of higher solids and liquid production.
For context on budget, Angi data puts the average cost of septic tank pumping at $427, with a range of $250 to $1,250 or more depending on tank size and location. As of 2026, planning for a few hundred dollars every few years is the realistic math; waiting for a backup is how systems fail on a holiday weekend.
A simple schedule for a Hesperia property might look like this:
- Pump and inspect on the recommended cycle for your household size and usage.
- Walk the drain field twice a year and note any wet spots or odors.
- Keep every report and receipt in one folder, physical or digital.
- Call for an inspection early if drains slow down or smells appear, rather than waiting for the scheduled date.
Why the Septic Inspection Steps Checklist Beats a Quick Pump-Out for Hesperia Properties
Anyone searching septic cleaning near me will find plenty of trucks that can empty a tank. The checklist is what separates a vacuum visit from actual service. Pumping without checking the baffles, photographing the interior, or testing flow leaves the most expensive failures undetected until they surface in your yard or your tenant's shower.
For the routine maintainer, the checklist turns septic care into a predictable line item instead of a gamble. For the landlord or business operator, it produces the paper trail that keeps you compliant without requiring you on-site. Either way, the standard is the same: a local crew, both lids open, an empty tank, documented baffles, a flow test, and a written report in your hands before the truck leaves.
If you need your septic tank serviced, Hesperia Septic can help.
Prefer to talk it through? Call (760) 249-7872 — a quick call is usually the fastest way to get a straight answer for your situation.